Emza's Chair Caning
  • Home
  • Restorations
    • Caning >
      • Hand Cane or Sheet Cane?
      • Hand Caning
      • Sheet Caning
      • French + Double Caning
      • Cane Binding
      • Danish Peel Caning
      • Special Project Caning
      • Color Matching Cane
    • Danish Cord
    • Shaker Tape
    • Hickory
    • Testimonials
    • Wait List and Policies
    • Blog
    • Referrals
  • Care
  • Location

Early Summer 2015 - Large Scale Sheet Caning Projects

7/21/2015

0 Comments

 
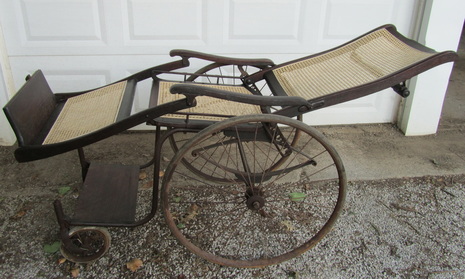
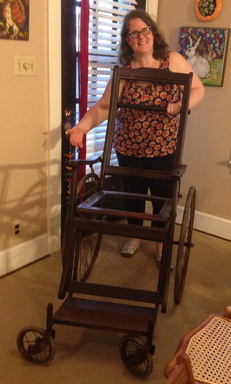
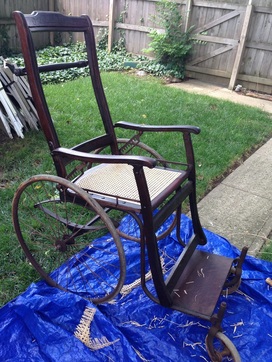
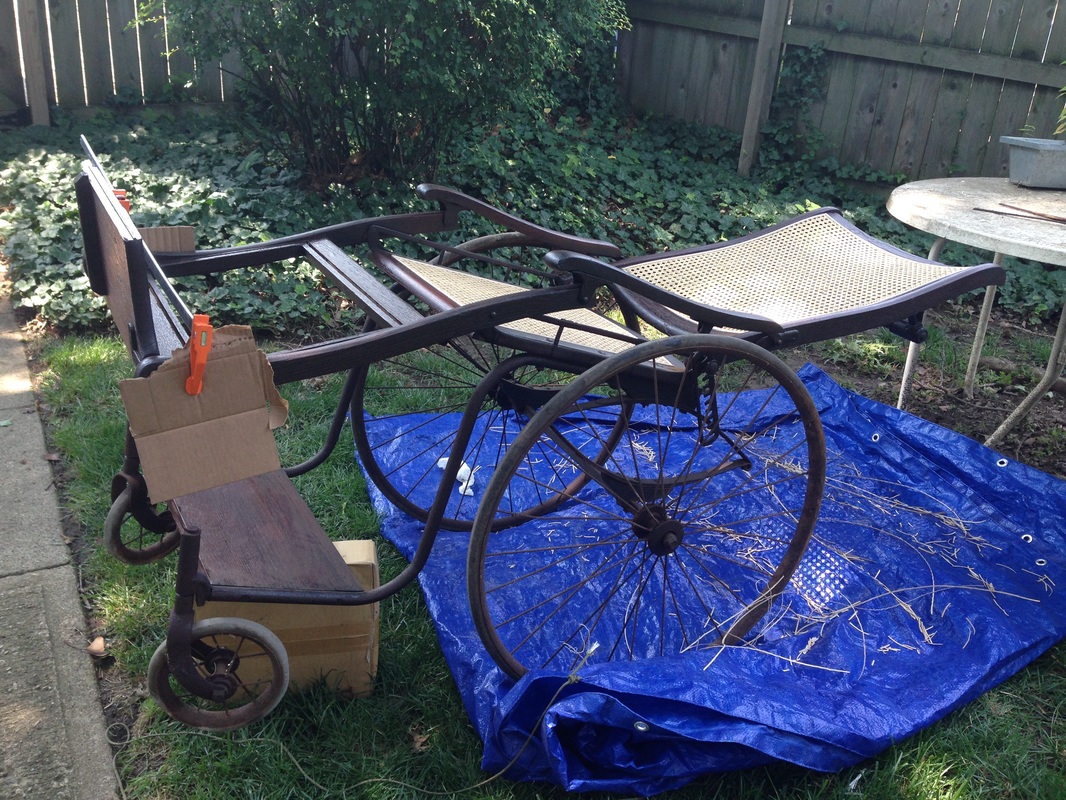
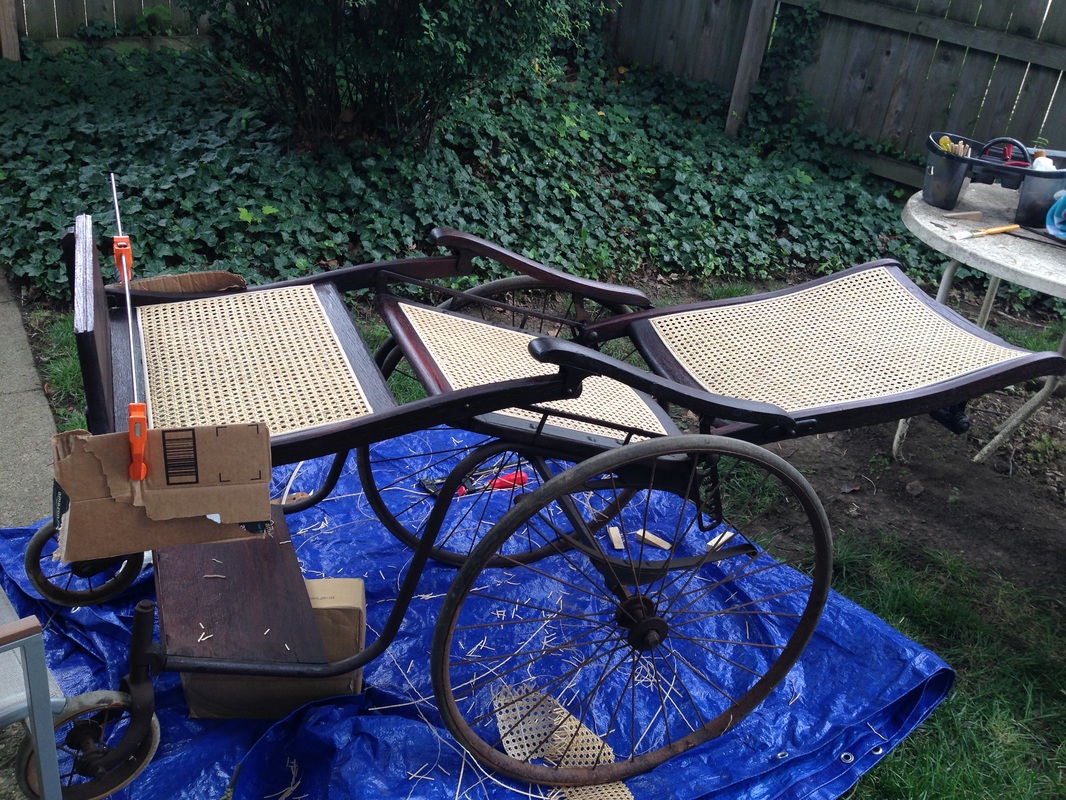
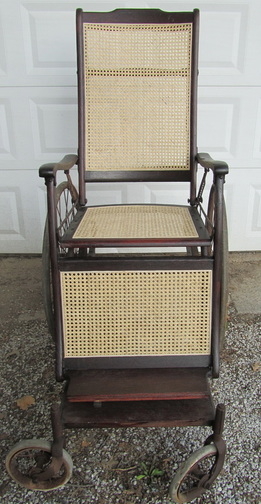
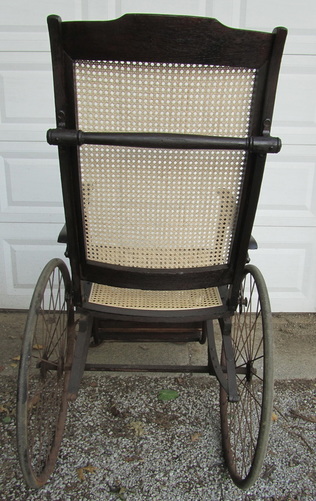
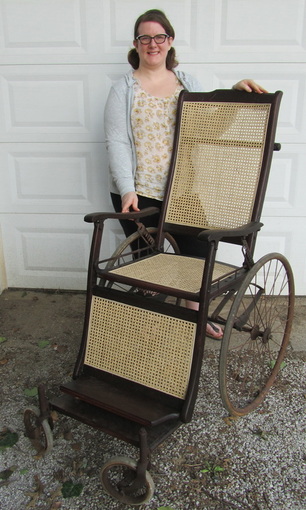
I recently got to work on two really cool large scale Sheet Caning projects - an antique wheel chair and a register cover from a 1920s Bexley home. Both things I only see in a blue moon! They were a nice diversion from the typical, normal size chair seats and backs I do day-to-day.
Picture
First up- the Wheelchair!

What can I say about it.... it was B-I-G!!!

I don't often take pictures with my work, but in this case I had to! I am 5'8" and this was the largest antique wheel chair I had ever seen.

Needless to say it got nick named "Big Daddy" pretty quickly.

The owner loves antiques and found this in a store south of Columbus. He is also in the medical field- what a great and interesting find for him! He refinished the wood before bringing it in to be caned.


How I tackled the "Big Daddy" (LOL!)

The wheel chair was too large to fit down the stairs to my workshop- so, it being summer and all, I did a little en plein air caning. I had to break it up into 3 nice, sunny days- one for each panel. Anyone living in central Ohio this summer knows 3 sunny days has been hard to find!


The seat was physically difficult to do as it was hard to work around, up and over the wheels, arms, tall back and foot rest. It seemed like there was always something in the way. My back hurt by the time I was done from all the contortions and I was glad to have a chiropractor for a husband!

Picture
Day 1 - seat install
Picture
Day 2 - Back install
Picture
Day 3 - Leg rest install
The back and leg panel were a bit kinder to my body, but I needed to be careful not to stress any of the antique wood that had less metal support structure than the seat. I also needed to fit, glue and clamp the folding foot rest into place. The hillbilly cardboard was a buffer between the wood and the clamp so that the pressure of the metal of the clamp would not mar the surface of the chair.
Here it is- the finished chair!
Picture
Picture
Picture
Picture

Personally, I do not believe that this would have been used as a wheel chair for the user to push themselves around or at least not often. They might have been able to pivot or scoot a bit if needed, but the big back wheels are not easy to turn while sitting and there is a convenient handle in the back for pushing. The extended foot area and front wheels that stick out make it a little harder to maneuver.

It likely was an invalid chair- for a patient who  could do very little, if anything, on their own. It reclines almost flat and at it's height would make it easier for someone to be transferred from the wheel chair to a bed.

An amazing marriage of furniture traditions with mechanism!
Picture
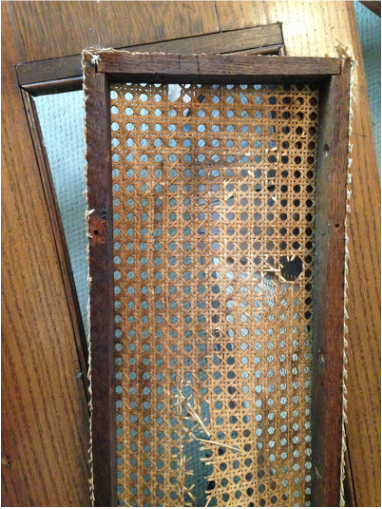
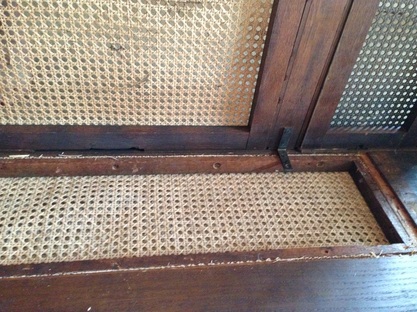
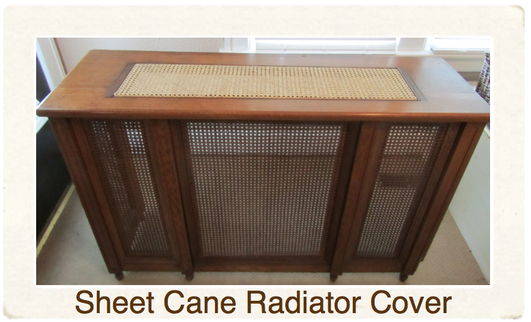
The owners late, beloved cat enjoyed sitting on the top- it got heat from the radiator below and sun from the window above. Over time, heat, sun (and probably claws) the caning dried out and became full of breaks and holes.
The second larger scale Sheet Caning project I did was an original radiator cover for a home in Bexley.
Not a level of detail you see in today's homes! This large cover goes over the original, working radiator. The caning lets the heat pass through, but the custom piece hides the radiator.
Picture
Old caning panel and wood frame
Picture
New caning going in
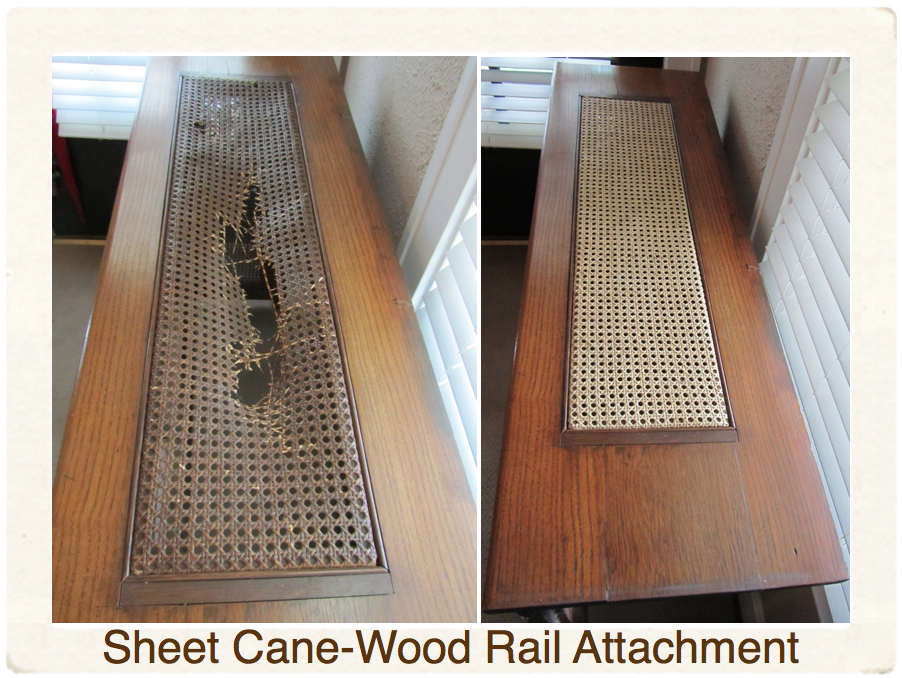
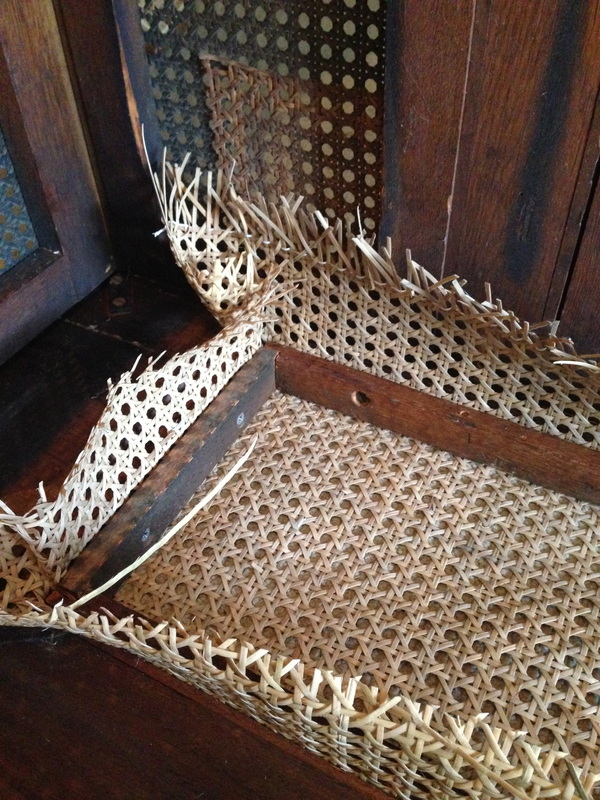
At first blush this looks like straight forward Sheet Caning with spline that would hold the caning into a grove in the wood. But it wasn't. The caning came out by unscrewing and removing a wood frame that it was stapled to. Installing new cane by staples was deemed impossible- the unfinished wood frame was very dried out and brittle. So I opted to install the new cane by positioning it into place and screwing and sandwiching it in with the wood frame- piece by piece. Since this was not a piece of furniture to be sat on and purely decorative, that option would work out just fine. This panel was pretty tricky to replace and I needed a few extra hands to help out for install.
Picture
After the caning was installed and trimmed- from the inside
Picture
From the top- new caning panel
Picture
After it was finished the owner took it to Coup Restorations for an overall tune up and staining the new cane to match the old.
Picture

Obligatory baby update-


Our little girl turned 6 months and desperately wants to learn to cane! Or do anything mom is doing... It will all come soon enough for the littlest Emza.


0 Comments

Your comment will be posted after it is approved.


Leave a Reply.

    E Emza Uphill

    Owner/Craftswoman

    Archives

    October 2016
    August 2016
    May 2016
    August 2015
    July 2015
    April 2015
    January 2015
    December 2014
    October 2014
    August 2014
    June 2014
    May 2014
    April 2014
    March 2014
    February 2014
    December 2013
    November 2013
    September 2013
    August 2013
    June 2013
    April 2013
    February 2013

    RSS Feed

Powered by Create your own unique website with customizable templates.